Getting Started
Welcome to Chamelingo! Thank you for choosing Chamelingo as your localization solution!
We're excited to help you on your journey to create new games and apps that can be enjoyed by people all around the world. If you experience any issues or have any feedback, please don't hesitate to create a bug report or feature request at:
https://deadlockdevelopment.github.io/report-issue/
We're trying to make Chamelingo as bug-free and easy to use as possible, so we appreciate your feedback!
Sincerely, your DeadLock Development Team!
Quick Start Guide
1. Open Project Settings
Navigate to your Chamelingo settings:
Edit -> Project Settings -> Chamelingo
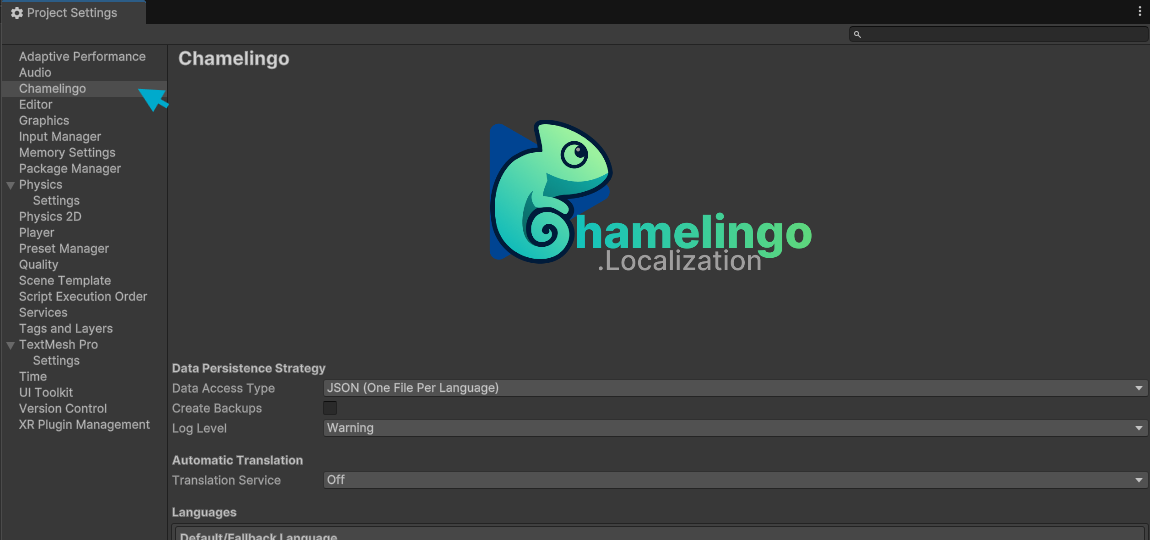
2. Select Data Access Type
Choose your preferred data storage format:
-
JSON (One File Per Language)
Ideal for small projects and easy manual editing -
CSV (Single File)
Suitable for larger projects with spreadsheet tools, may become large -
CSV (Multiple Files)
One file per language, optimal for large projects using spreadsheets

Data Migration
This can be changed anytime. Chamelingo supports automatic data migration between DataAccess Types, but keep in mind that this will take longer if you already have a large translation base.
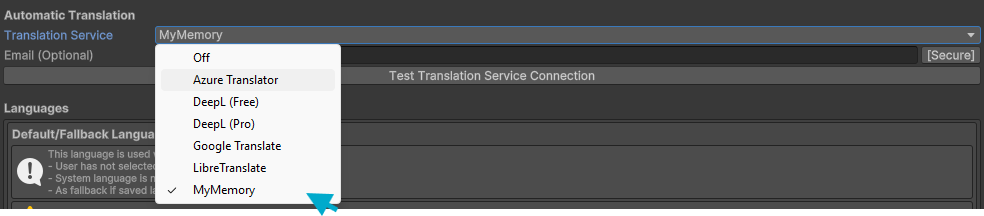
3. Setup Auto-Translation (Optional)
If you want to use auto-translation, select your preferred service:
-
MyMemory
Completely free with no setup required, but provides lower quality translations -
LibreTranslate
Self-hosted or Free public instance, easy with Docker setup, limited quality -
Google Translate
Requires API key and may incur costs, reliable and widely used -
DeepL Free (Best option in our opinion)
Requires API key with character limits, needs an account and setup -
DeepL PRO
Requires API key and premium subscription, highest quality translations -
Azure Translator
Requires API key and may incur costs, reliable enterprise solution
Auto-Translation Changes
This can be changed anytime. Auto-Translation can be used when creating a new key or in the Translations Tab.
4. Setup Your Languages
Add Languages
Add the languages you want to support in your project
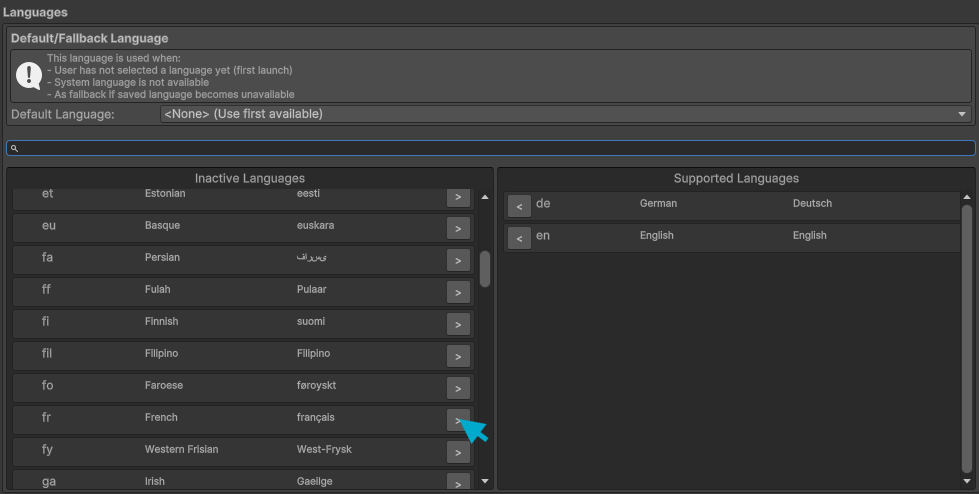
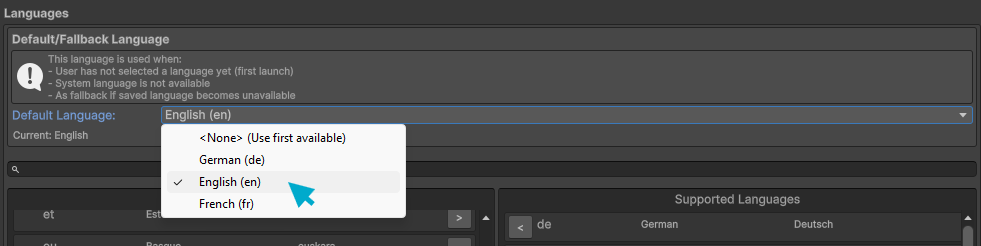
Set Default
Set the default/fallback language for your application
Language Support
Language support can be added anytime. Don't forget to translate newly supported languages. Note that in some cases, the standard font may not support special characters, which can lead to unreadable text.
5. Localizing Text Components
Follow these steps to localize a text component:
-
Add or select a text component in your scene
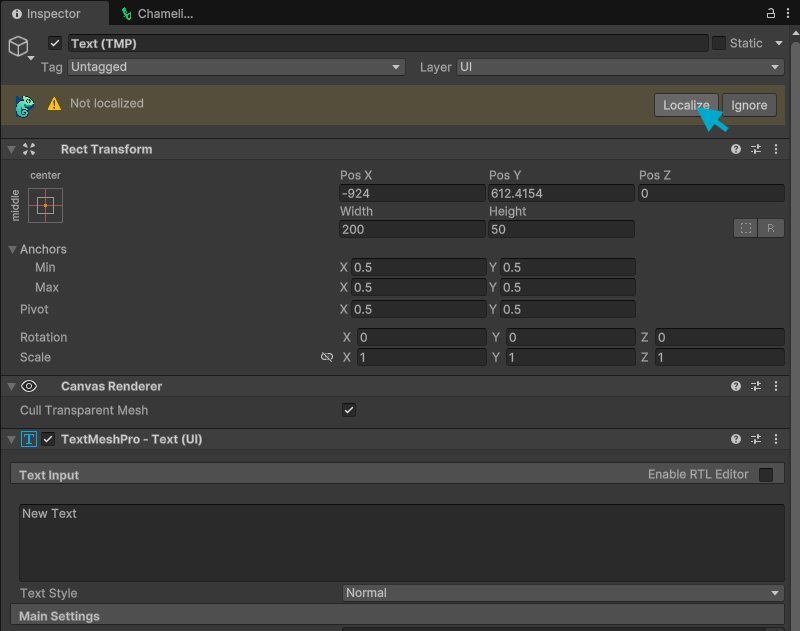
-
In the Inspector at the top, you'll see the localization status
-
Click Localize to add the Chamelingo component
-
In the Chamelingo component, select or create a translation key
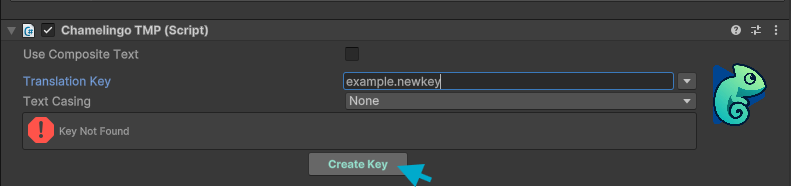
-
If you create a new key, the Key Creation Dialog appears
- Enter an initial translation for the currently selected language
-
Optionally, enable Auto Translate if you've configured a translation service to automatically translate to other languages
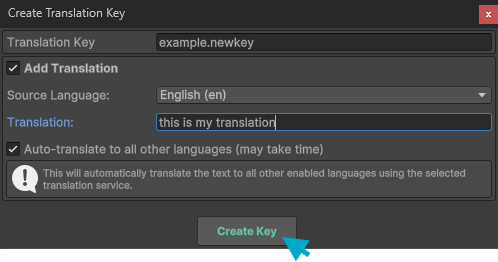
-
Your text is now localized!
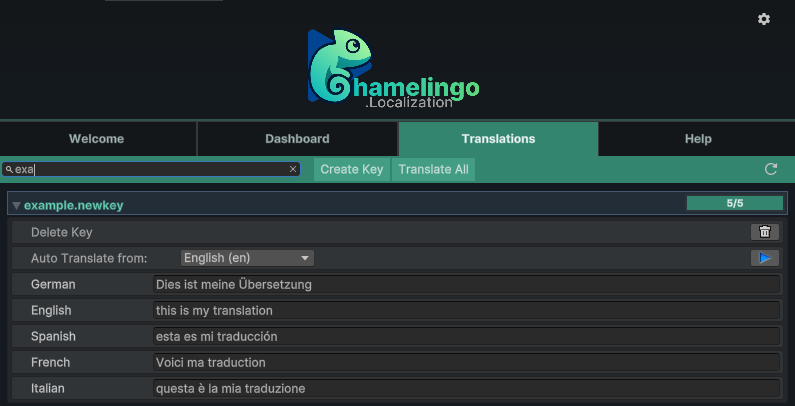
Translation Management
You can also use the Translations tab to manage all your translation keys and texts.
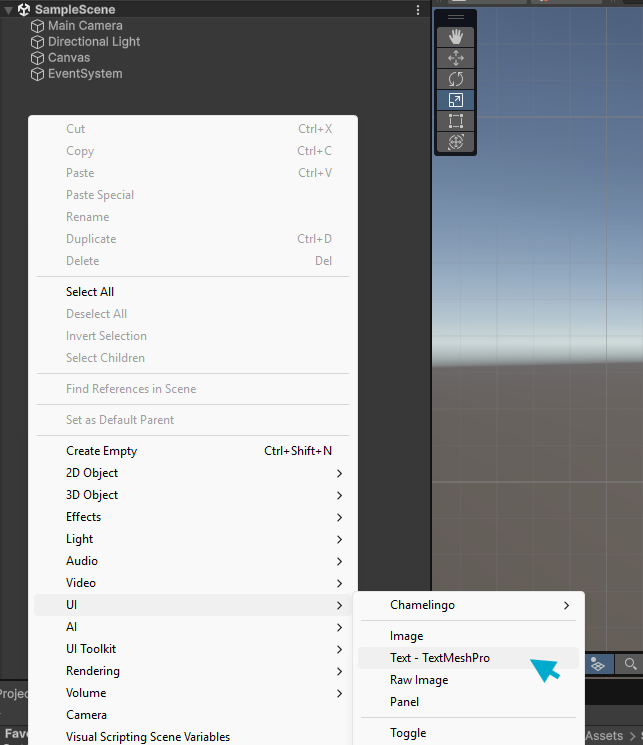
Switching Languages
You can add the provided language selector dropdown: GameObject -> UI -> Chamelingo -> Language Selector

6. Localizing Non-Text Components
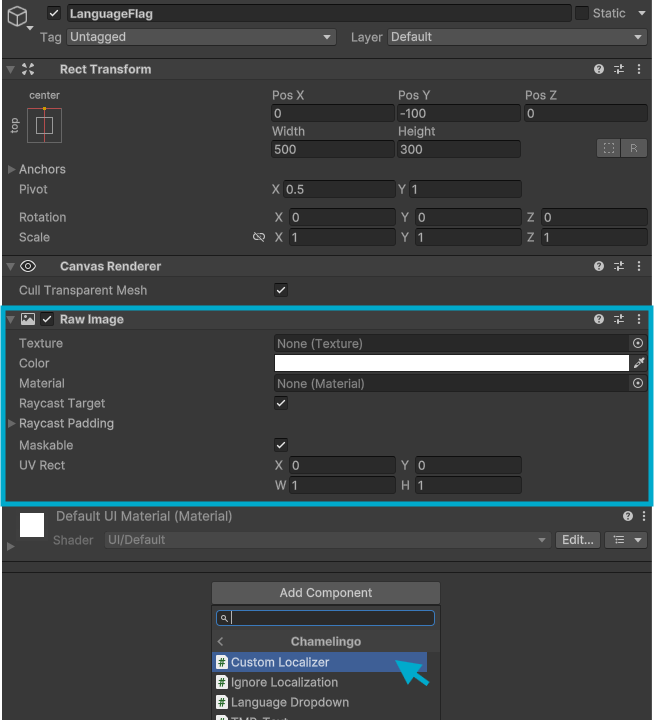
Since Chamelingo v1.3.4 you can also localize any other component in your project, thanks to the CustomLocalizer component. To localize a non-text component, follow these steps:
- Add the CustomLocalizer component to the same GameObject as the component you want to localize
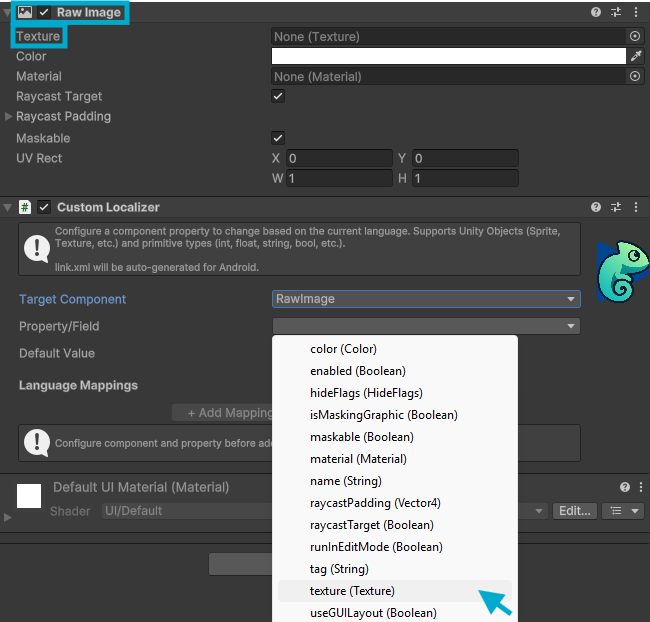
- In the newly attached Custom Localizer component, select the target component and the target property you want to localize:
- Add a default value, and add mappings for each language you want to have a separate value
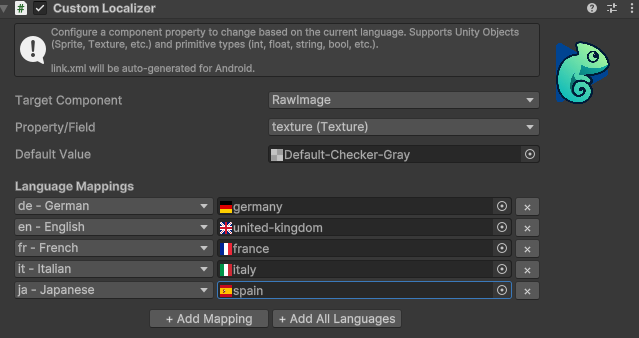
- The value of the configured property now automatically switches based on the current language
Supported Properties
Using the CustomLocalizer, you can basically localize anything, for example: localized images, localized audio clips, or theme variations based on the current language
7. Language Selection & Persistence
Chamelingo automatically manages language selection with the following priority:
- User's Saved Language - If the user has previously selected a language, it will be used
- System Language - If no choice is saved, the device's system language is used
- Default Language - If system language isn't supported, your configured default language is used
- First Available - If default language isn't found, the first available language is used
Language Persistence
When a user changes language (via Language Selection Dropdown or programmatically), it's saved to PlayerPrefs and persists across app restarts on any device. This means users only need to select their language once, and it will be remembered even after closing and reopening your app.
Programmatic Access
// You can change languages via code using: Chamelingo.LoadLanguage(newCultureInfo);
// or react to language changes: Chamelingo.Subscribe(OnLanguageChanged);
For more information, check out the API Reference.